Keep your kid busy with owl pellet dissecting activity this quarantine

These days when due to COVID 19 people in countries across the world are staying at home or practicing social distancing, it is becoming difficult for the parents to keep their kids engaged. Kids have a very short attention span; they tend to get bored easily and hence, end up being troublemakers for the adults. In situations like these when the entire family is at home, parents can do something productive and utilize the time that they have with the kids in activities which will not just be fun for the kids but will also educate them at the same time. And one such thing is learning how to dissect an owl pellet. Yes, this can be very exciting and great learning experience for the kids as well as for you.
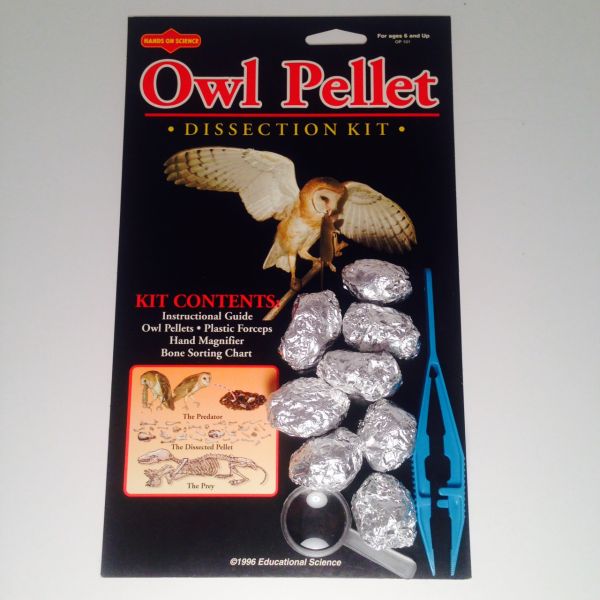
To begin with, you will have to order a sterile owl pellet kit which contains the dry and unsmelly pellet. After you have ordered and received the pellet kit, you can begin your home school science lessons.
First things first: define the aim of the activity.
Aim of the activity: The goal of this home school science activity is to identify the types of prey that are consumed by owls by dissecting the contents of a pellet.
What are the things needed for this activity:
- Owl pellets (minimum 2)
- Tweezers or forceps
- Toothpicks
- A hand magnifier
- Study guide
- Bone sorting chart
Most of these things you will get in our owl pellet dissection kit.
How to perform the activity?
Divide the entire activity into two days:
Day 1:
On the first day, the parent can do it himself while demonstrating everything. The things he should do include the following:
- Place the pellet on the black construction paper.
- Show the bone sorting chart (comes as a part of the kit )to the kid so that he has an idea about what could be inside the pellet.
- First, observe the pellet without dissecting it. Measure and record the dimensions of the entire pellet.
- Now is the time to instigate curiosity in your kid; ask him to make predictions about what is inside the pellet and record his answer on a paper.
- With the help of forceps, start dissecting the pellet.
- Along with your kid, observe the parts dissected with a hand magnifier and compare it with the bone sorting chart. Also check whether the kid’s guess about the pellet’s content was right or not.
- In the end, answer the questions of the kid while also educating him about the facts given in the study guide.
Day 2.
On day 2, let the kid be the one doing the activity.
- Before he begins doing anything, ask him about the facts discussed a day before.
- Now give him the kit and monitor:
- Whether or not he first places the black sheet and then the pellets over it.
- How he measures the length and width of the outside of the pellet.
In case, he does it wrong, you can give hints about how you did it yesterday and if he still does it wrong, do it to show him the right way.
- When he begins the dissecting process, take a toothpick in your hand, while letting the kid have the forceps as he is the one performing the activity today. Meanwhile, you can keep dissecting the pellet alongside him.
- Ask him to match the bones with the ones mentioned in the bone chart. Record his observations, but don’t reveal the result until he is done with the activity completely.
- When dissecting and guessing is over, you can re-read the facts from the study guide, so neither you nor he forgets these anytime sooner.
Note: In the end, don’t forget to ask your kid to wash his hands.
So, this is how you can make your kid learn while also keeping him engaged in a fun activity. And as far as the cleanliness is concerned, let us tell you that our owl pellets are heat treated and sanitized. You can buy these kits or simply the pellets. We offer pellets in different quantities. Check out our entire range before making the purchase.
Let learning be fun.
About the Author